折腾了一通之后,还是更喜欢 snippet 主题,并且发誓不在折腾了,好吧,我开玩笑的呢!
更新
发现有些代码高亮会将空格变为 true,修改hightlight的tab_replace配置为false
上一页下一页显示异常(html的safe转码问题)
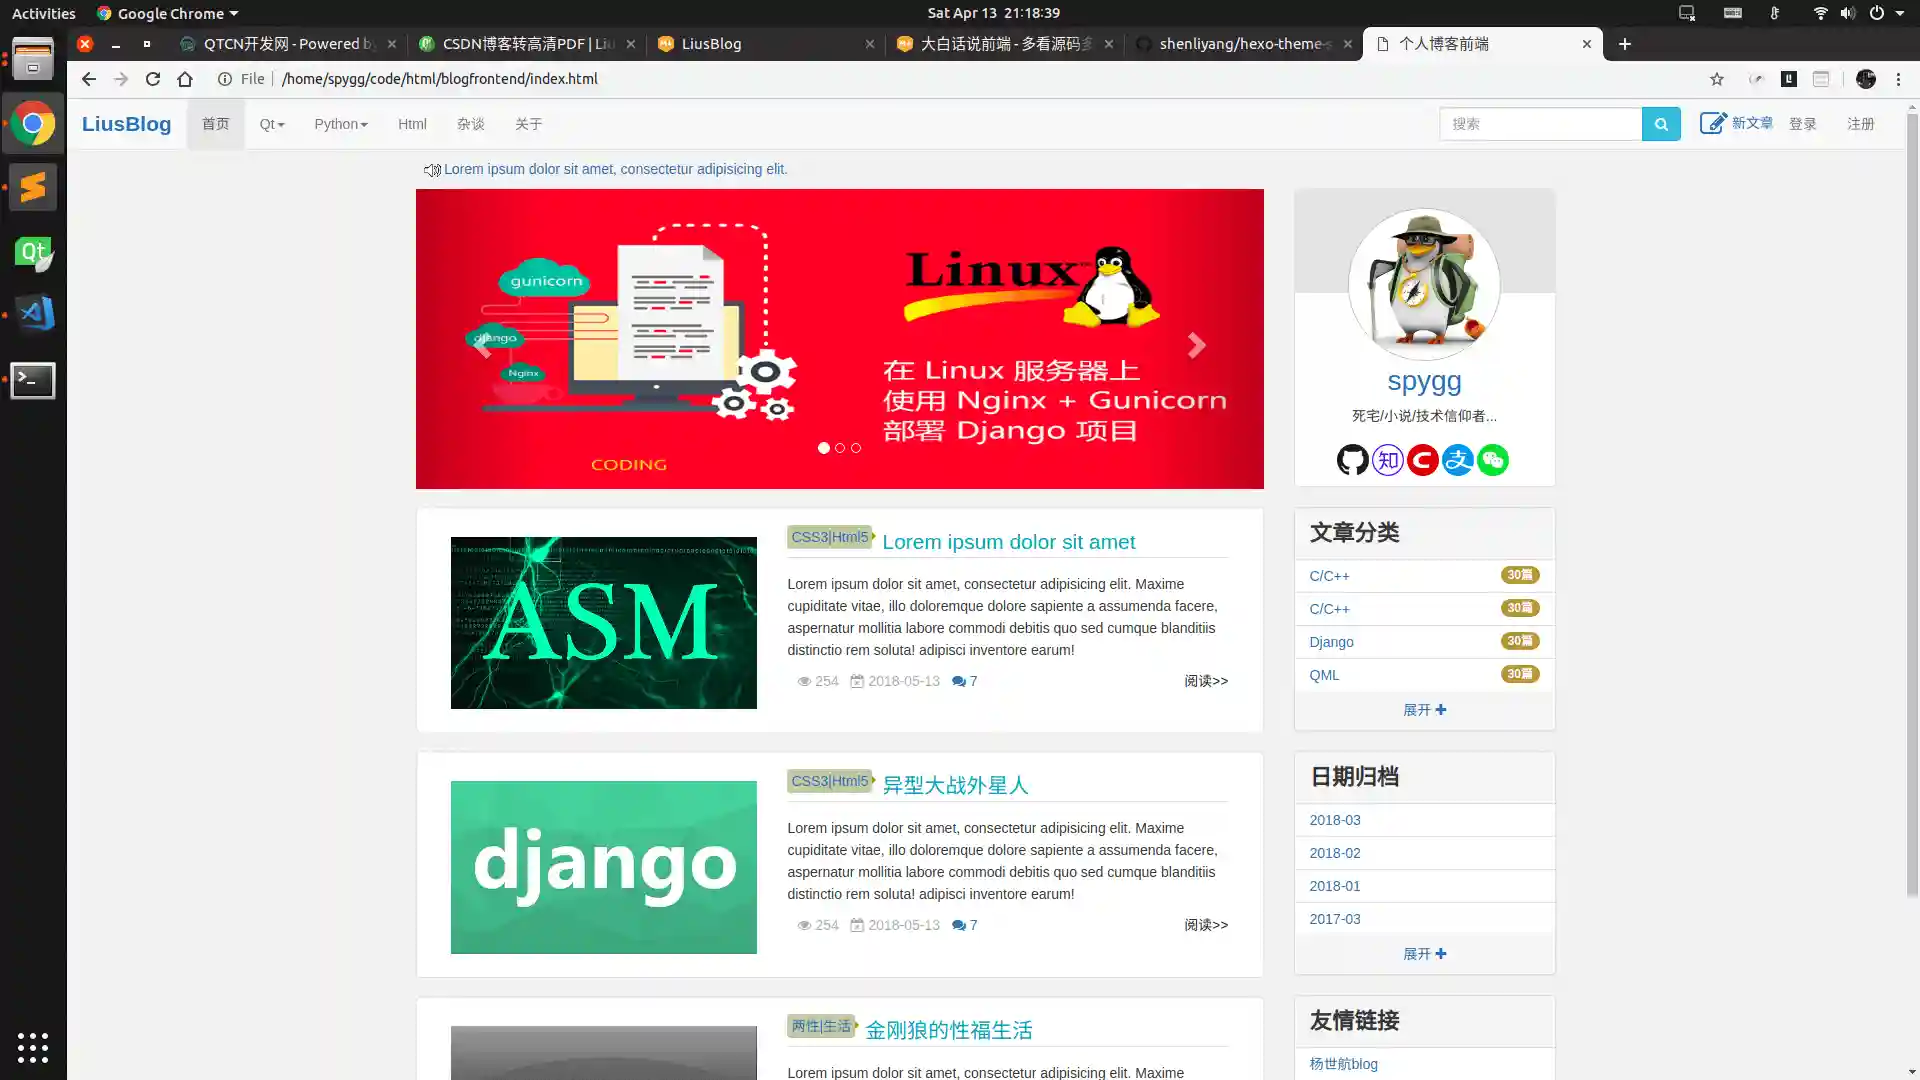
本人也做了一个动态的不过没买服务器,如下图所示
主题官网 主题 github
插入广告(google Ads) 步骤
到谷歌广告主页 ,注册和登录
打开文件 hexo-theme-snippet/layout/head.ejs 在头部加入以下代码
1 2 3 4 5 6 7 8 9 10 11 12 13 14 15 16 17 18 19 20 21 22 23 24 25 26 27 28 29 30 31 32 33 34 35 36 37 38 39 40 41 42 43 44 45 46 <script async src ="https://pagead2.googlesyndication.com/pagead/js/adsbygoogle.js" > </script > <script > (adsbygoogle = window .adsbygoogle || []).push({ google_ad_client : "ca-pub-7854187021513757" , enable_page_level_ads : true }); </script > <script type ="text/javascript" > function IsPC ( var userAgentInfo = navigator.userAgent; var Agents = ["Android" , "iPhone" ]; var flag = true ; for (var v = 0 ; v < Agents.length; v++) { if (userAgentInfo.indexOf(Agents[v]) > 0 ) { flag = false ; break ; } } return flag; } window .addEventListener('load' , function ( if (IsPC()){ var googleAds = document .getElementsByClassName('googleAd' ); if (googleAds != undefined ){ for (var i = 0 ; i < googleAds.length; i++) { googleAds[i].innerHTML = '<ins class="adsbygoogle"\ style="display:block; text-align:center;"\ data-ad-layout="in-article"\ data-ad-format="fluid"\ data-ad-client="ca-pub-7854187021513757"\ data-ad-slot="4637472251">\ </ins>' var scriptFun = document .createElement("script" ); scriptFun.text = "(adsbygoogle = window.adsbygoogle || []).push({});" ; googleAds[i].appendChild(scriptFun); } } } .......
等待回信
在 source 目录下新建 ads.txt 内容如下
1 google .com, pub-7854187021513757 , DIRECT, f08 c47 fec0942 fa0
回信通过后,在广告->广告单元->创建新的广告单元中选择,选取要使用的样式 ,我选择了文章内嵌广告 然后把代码加到网页中
1 2 3 4 5 6 7 8 9 10 11 12 13 14 15 16 17 18 19 20 21 22 23 24 25 26 27 28 29 30 31 32 33 34 35 36 37 38 39 40 41 42 43 44 45 46 47 48 49 50 51 52 53 54 55 56 57 58 59 60 61 62 63 64 65 66 67 68 69 70 71 72 73 74 <p id ="process" > </p > <article class ="post" > <div class ="post-head" > <h1 id ="<%= page.title %>" > <% if (page.link){%> <a href ="<%- url_for(page.link) %>" target ="_blank" > page.title %></a > <% }else { %> <%= page.title|| 'NO Title!' %> <% } %> </h1 > <%- partial('_partial/article-meta' , {post: page}) %> <% var diffDays = moment(new Date()).diff(moment(page.date), 'day' ); var warningTextArr = theme.warning.text.split("%d" ); %> <% if ((theme.warning.days!=0 ) && diffDays > (theme.warning.days || 300 )){ %> <p class ="fa fa-exclamation-triangle warning" > <%- warningTextArr[0 ] %><strong > <%= diffDays %></strong > <%- warningTextArr[1 ] %> </p > <% } %> </div > <%- partial('_partial/gallery' ,{post: page}) %> <div class ="googleAd" > <script async src ="https://pagead2.googlesyndication.com/pagead/js/adsbygoogle.js" > </script > </div > <div class ="post-body post-content" > <%- page.content %> </div > <% if (theme.reward.alipay || theme.reward.wepay){ %> <%- partial('_partial/reward' ) %> <% } %> <div class ="post-footer" > <div > <% if (theme.declaration.enable){ %> <%- theme.declaration.title %>:<%- theme.declaration.tip %><%- theme.cc %> <% } %> </div > <div > <% if (theme.cc){ %> <%= __('post_licence' ) %>: <%- theme.cc %> <% } %> </div > </div > </article > <div class ="article-nav prev-next-wrap clearfix" > <% if (page.prev){ %> <a href ="<%- url_for(page.prev.path) %>" class ="pre-post btn btn-default" title ='<%- page.prev.title %>' > <i class ="fa fa-angle-left fa-fw" > </i > <span class ="hidden-lg" > 上一篇</span > <span class ="hidden-xs" > <%- page.prev.title %></span > </a > <% } %> <% if (page.next ){ %> <a href ="<%- url_for(page.next .path) %>" class ="next-post btn btn-default" title ='<%- page.next .title %>' > <span class ="hidden-lg" > 下一篇</span > <span class ="hidden-xs" > <%- page.next .title %></span > <i class ="fa fa-angle-right fa-fw" > </i > </a > <% } %> </div > <div class ="googleAd" > <script async src ="https://pagead2.googlesyndication.com/pagead/js/adsbygoogle.js" > </script > </div > <% if (page.comments){ %> <div id ="comments" > <%- partial('_vendor/comments/index' , {page: page}) %> </div > <% } %>
首页广告
修改_config.yml,在 widgets 中将-search 去掉
找到 layout/_widget/notification.ejs 文件修改内容如下
1
2
3
4
5
6
7
8
9
10
11
12
13
14
15
16
17
18
<%if(theme.notification){%> <div class ="widget" > <h3 class ="title" > 广告推广</h3 > <div class ="notification" > <script async src ="https://pagead2.googlesyndication.com/pagead/js/adsbygoogle.js" > </script > <ins class ="adsbygoogle" style ="display:block; text-align:center;" data-ad-layout ="in-article" data-ad-format ="fluid" data-ad-client ="ca-pub-7854187021513757" data-ad-slot ="4190749692" > </ins > <script > (adsbygoogle = window .adsbygoogle || []).push({}); </script > </div > </div > <%}%>
安装
下载插件:
1 git clone git://github.com/shenliyang/hexo-theme-snippet.git themes/hexo-theme-snippet
安装依赖:
1
2
npm i hexo-renderer-ejs hexo-renderer-less hexo-deployer-git -S cnpm install hexo-generator-feed --save
配置 在主_config.yml 修改主题为 1 theme : hexo-theme -snippet
注意 categories 和实际文章中的对应(包括大小写)
1
2
3
4
5
6
7
8
9
10
11
12
13
14
15
16
17
18
19
20
21
22
menu: - page: home url: / icon: fa-home - page: Qt url: /categories/Qt icon: - page: Python url: /categories/Python icon: - page: Linux url: /categories/Linux icon: - page: 杂谈 url: /categories/杂谈 icon: - page: 时间轴 url: /archives/ icon: - page: 关于 url: /about/ icon:
生成 about 页面
hexo new page about
编写 about 目录下的 index.md
1
2
3
4
5
6
7
8
9
10
11
12
13
14
15
16
17
18
19
20
21
22
23
24
25
26
27
--- title: 关于博主 date: 2019-04-13 23:11:43 --- * 本页面是采用MARKDOWN 和 HTML混合编写 * 主题基于 snippet * 一个对博主的简介 * 人生苦短, 我用 Python! * 简单高效, 必须C语言 * 优雅通用, 我选Qt * 博主 Github 地址:https://github.com/spygg * 联系邮箱:liushidc@163.com * 我的知乎: https://www.zhihu.com/people/spygg/activities * 本小节是使用HTML编写 * 如果你感觉有用的话,大胆的赏赐吧,(*^__^*) <img style="width: 200px;display: block;margin: 0 auto;" src="/img/weixincode.jpg"> <center style="font-size: 20px; margin-bottom: 2em;">微信赞助</center> <img style="width: 200px;display: block;margin: 0 auto;" src="/img/zhifubaocode.jpg"> <center style="font-size: 20px; margin-bottom: 2em;">支付宝打赏</center>
同时修改 themes/hexo-theme-snippet/layout/_partial/header.ejs 下的头像链接为关于页面
1 <a class ="header-avatar" href ="/about" title ='<%= config.author %>' >
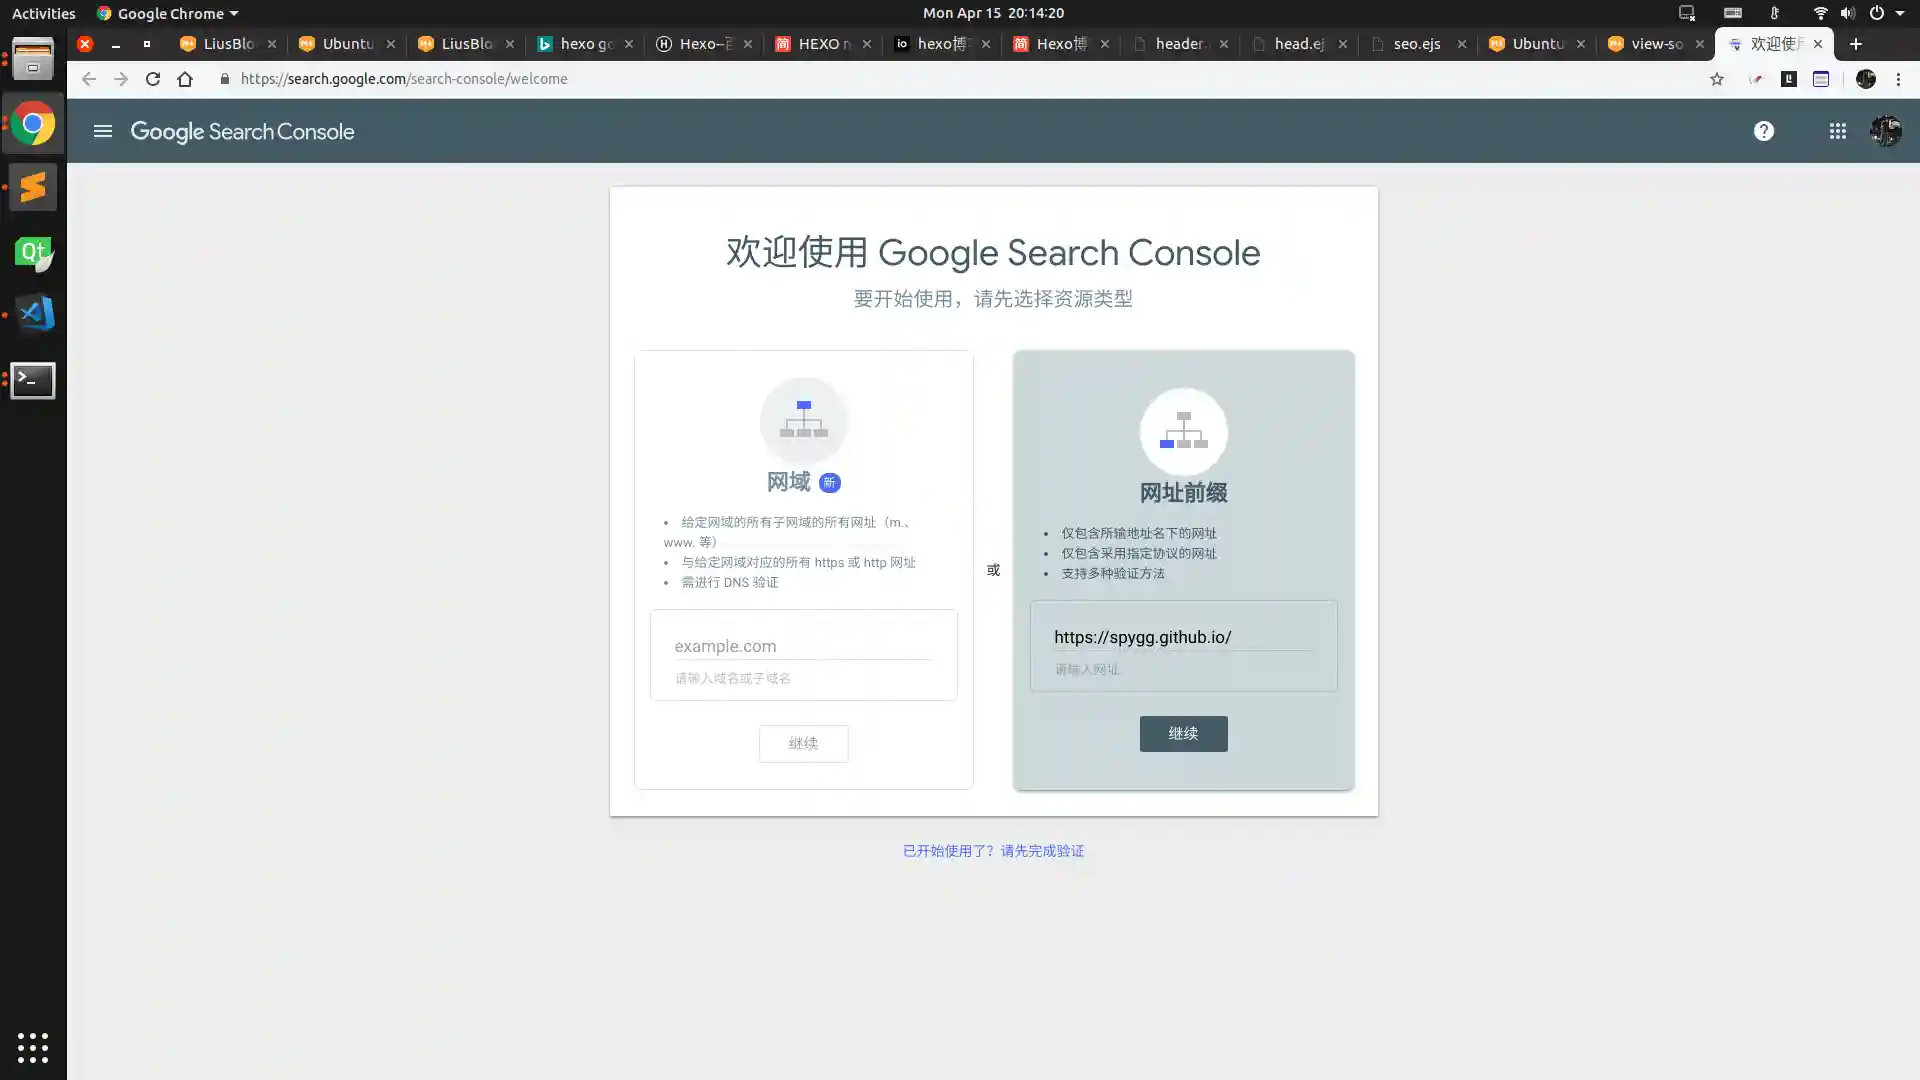
添加 google 索引
注册 google 账号
打开google 的控制台 选择第二个如下图所示
在设置页面中会提供验证方法
html 页面验证(这一步 google 会给一个 html 文件,放到工程的source 目录下,这样在 hexo g 的时候会自动复制到站点根目录)
html 字段验证(打/themes/hexo-theme-snippet/layout/_partial/head.ejs 文件)在头部添加
1 <meta name ="google-site-verification" content ="google提供的字段在控制台里面会有" />
生成站点地图
1 cnpm install hexo-generator-sitemap
在控制台左侧的站点地图中输入站点地图的名称(一般为 sitemap.xml)
在source 目录下新建 robots.txt 文件内容如下(即允许所有)
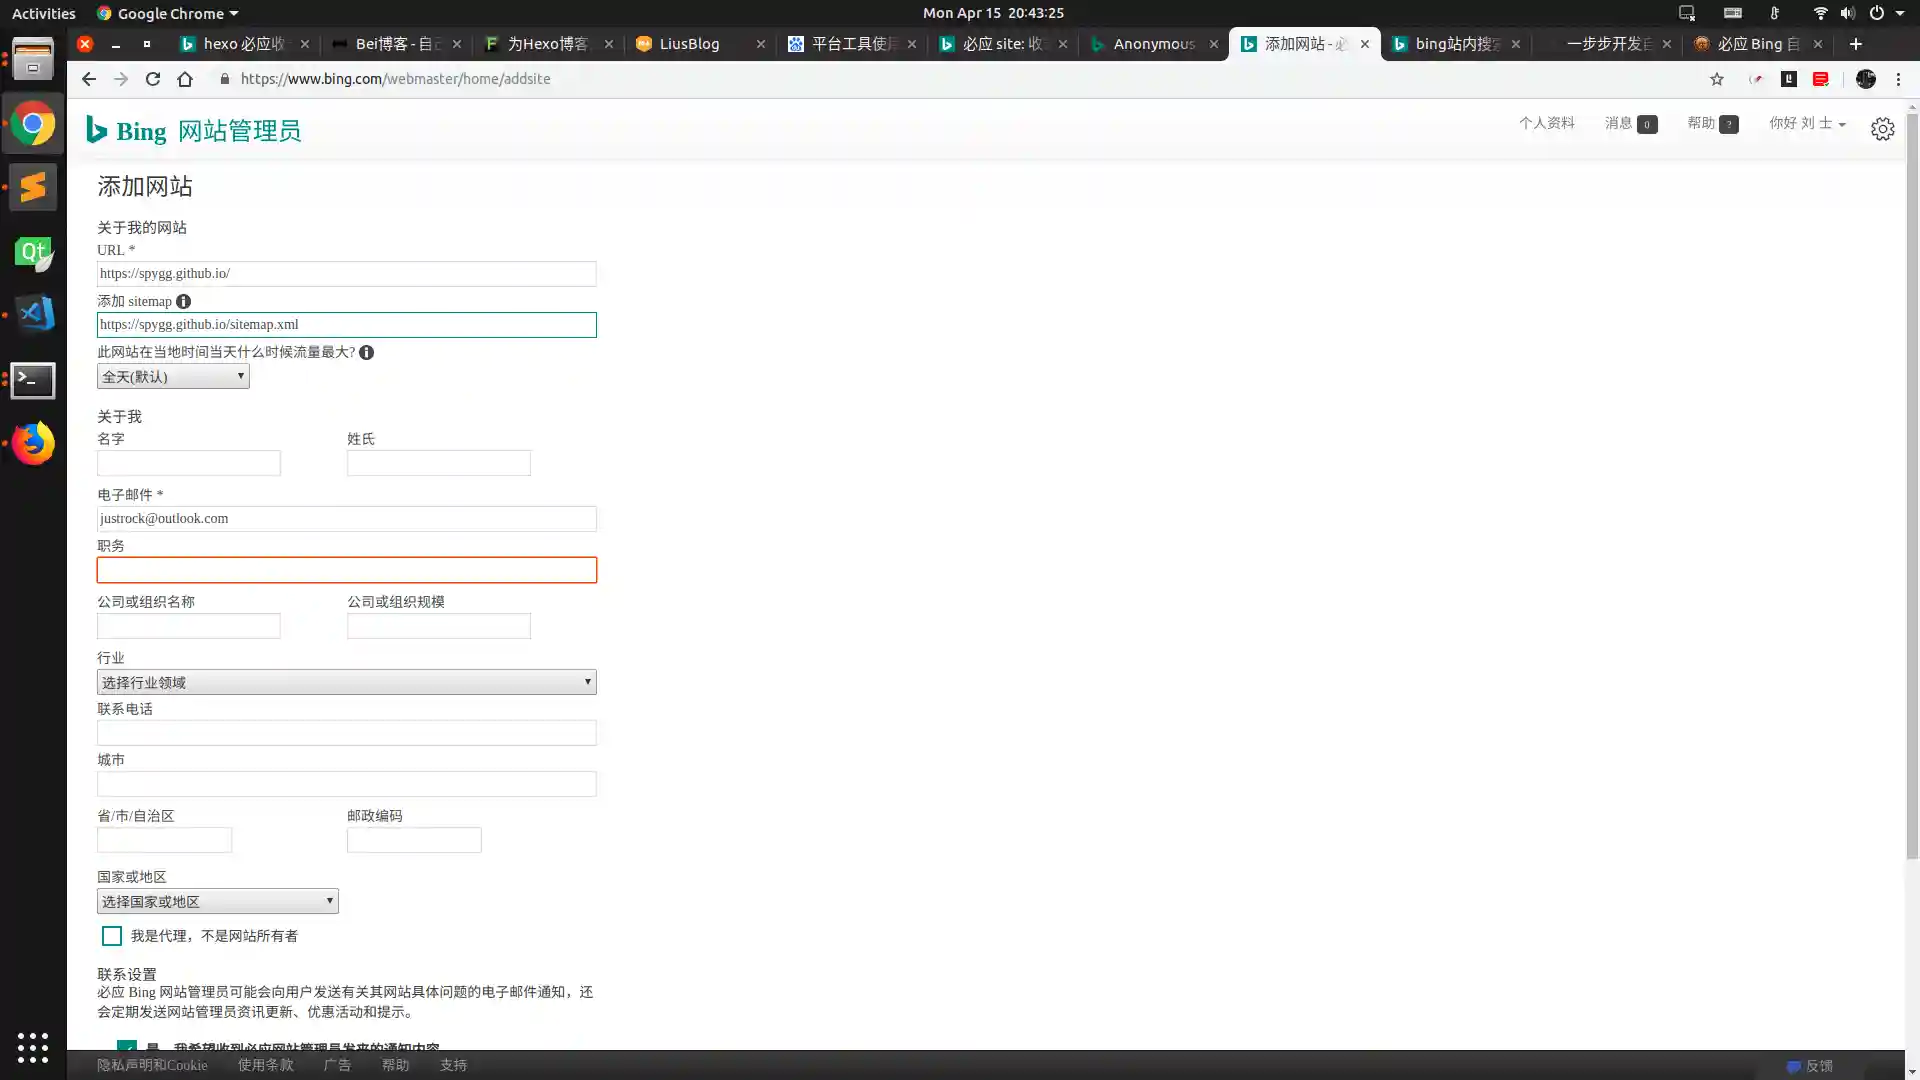
添加必应索引
登录必应控制台
添加网站
添加验证方法和 google 类似
必应站内搜索
这一步是基于上一步的操作,在 node_modules/hexo/lib/plugins/helper/search_form.js 文件中
增加 target=”_blank”
修改 google.com 为 bing.com
修改 sitesearch 为 q1
在 value 值前添加 site:
修改后的文件为
1 2 3 4 5 6 7 8 9 10 11 12 13 'use strict' ;function searchFormHelper(options = {}) { const config = this.config; const className = options .class || 'search-form' ; const text = options .hasOwnProperty('text' ) ? options .text : 'Search' ; const button = options .button; return `<form action="//bing.com/search" target="_blank" method ="get" accept-charset="UTF-8" class ="${className}"><input type ="search" name ="q" class ="${className}-input"${text ? ` placeholder="${text}"` : '' }>${button ? `<button type ="submit" class ="${className}-submit">${typeof button === 'string' ? button : text }</button>` : '' }<input type ="hidden" name ="q1" value ="${config.url}"></form>`; } module.exports = searchFormHelper;
修改 themes/hexo-theme-snippet/layout/_widget/search.ejs 文件
1 <%- search_form({'button' :'必应搜索' ,'text' :'Bing Search' }) %>
修改_config.yml 中的
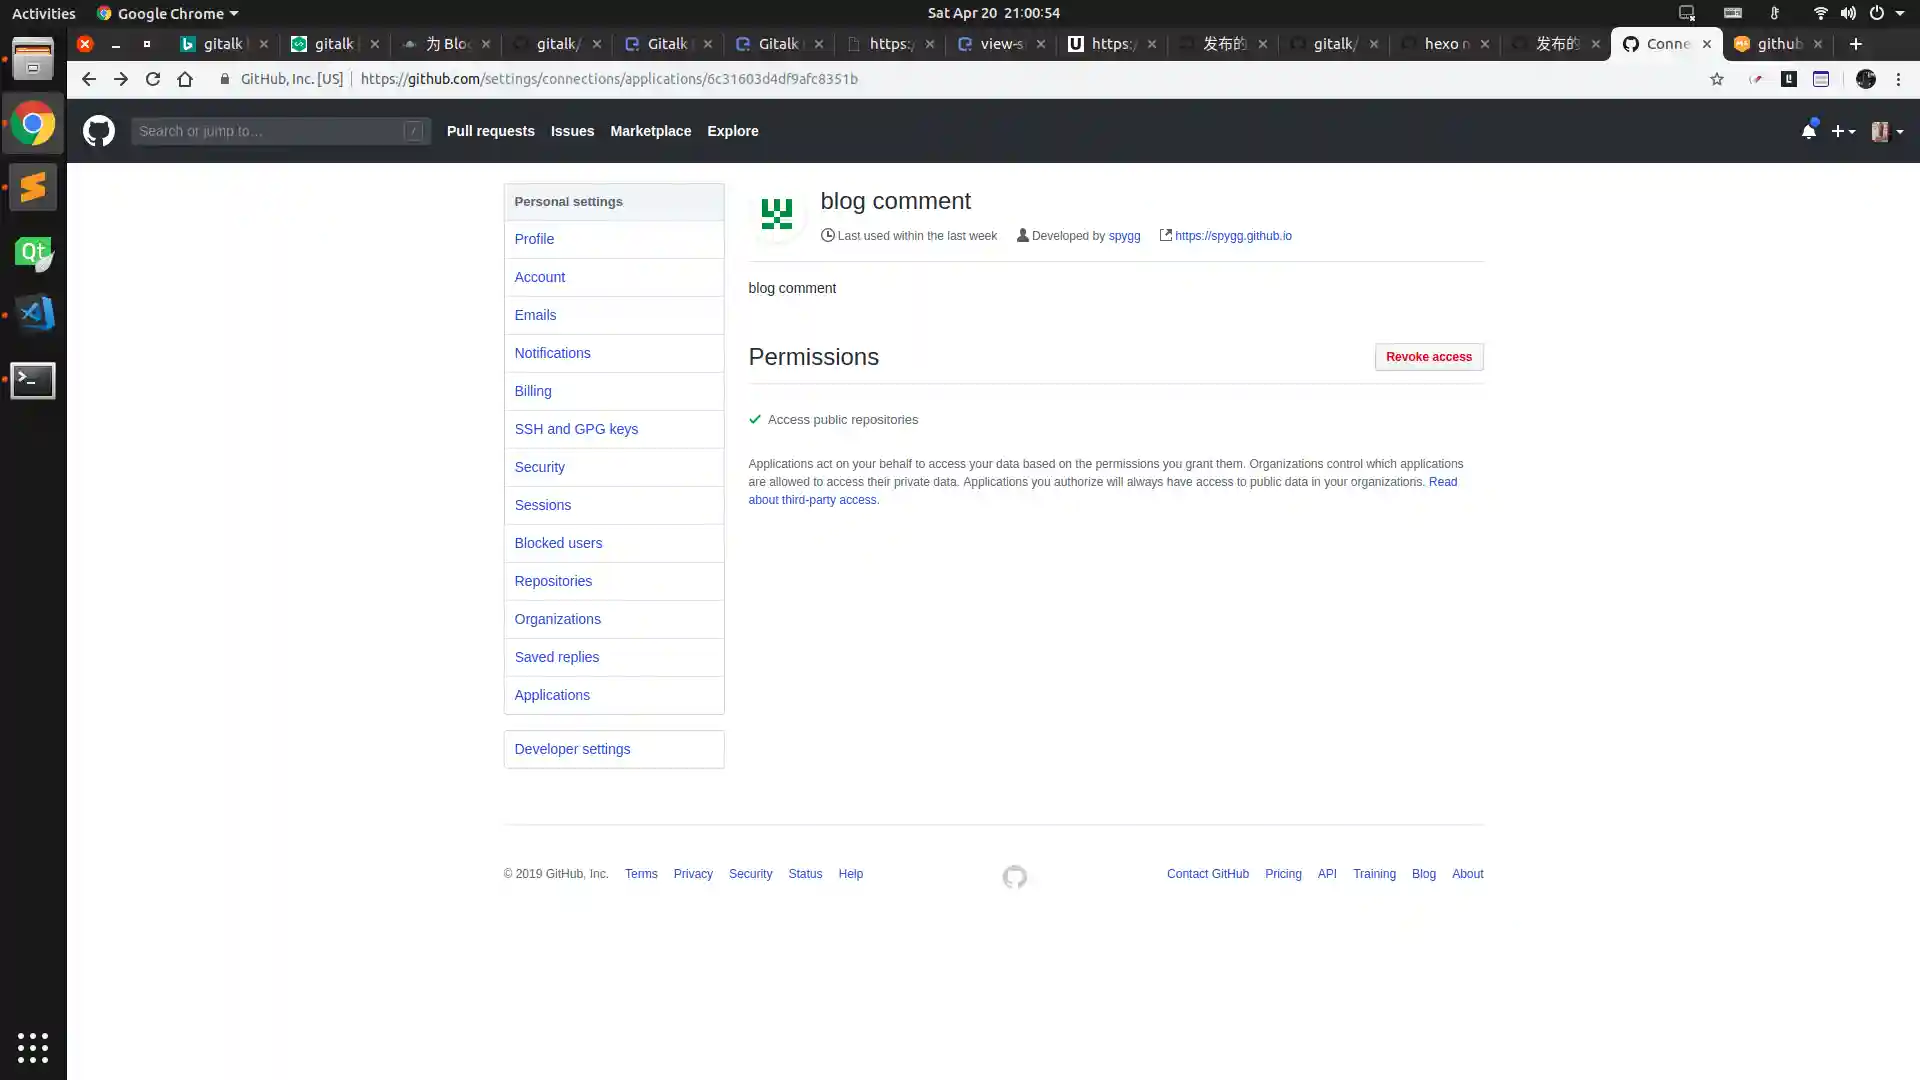
gitalk 评论系统 网上一大堆好多是过时(或者与本主题不一致)信息,找了半天都一直不行,授人以鱼不如授人以渔,下面本大神就一步步演示如何搞定的参考网址 gitalk
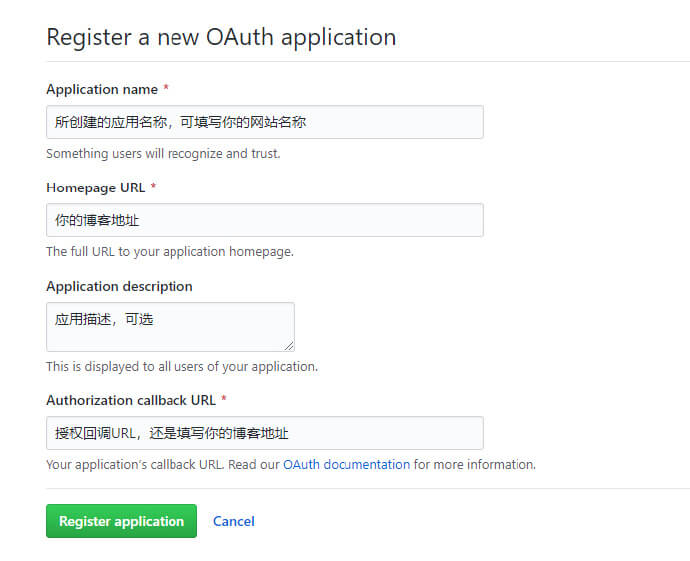
创建一个新的 OAuth App网站 新建一个如下图
点击上图中的左边的Develop Settings 新建一个应用如下图所示
填写配置信息从下图所示的页面中找到最重要的两个 ID
配置_config.yml
1 2 3 4 5 6 7 8 9 10 gitalk : enable : true clientID : 6 c31603 d4 df9 afc8351 b clientSecret : c9 e81 f3 ac1492550170 fccb28 c0 f8 bb16 e3 b7 ed1 repo : blogcomment owner : spygg admin : spygg id : window.location.pathname
找到 themes/hexo-theme-snippet/layout/_vendor/comments/gitalk.ejs 修改成以下内容,同时解决 Validation Failed 的错误参见链接
1 2 3 4 5 6 7 8 9 10 11 12 13 14 15 16 17 18 19 <link rel ="stylesheet" href ="https://cdn.bootcss.com/gitalk/1.5.0/gitalk.min.css" > <script src ="https://cdn.bootcss.com/gitalk/1.5.0/gitalk.min.js" > </script > <script src ="https://cdn.bootcss.com/blueimp-md5/2.10.0/js/md5.js" > </script > <div id ="gitalk-container" > </div > <script type ="text/javascript" > var gitalk = new Gitalk( { // Gitalk配置 clientID: "<%= theme.gitalk.clientID%>" , clientSecret: "<%= theme.gitalk.clientSecret%>" , repo: "<%= theme.gitalk.repo%>" , owner: "<%= theme.gitalk.owner%>" , admin: ["<%= theme.gitalk.admin%>" ], id : md5(<%= theme.gitalk.id %>), distractionFreeMode: true } ); gitalk.render('gitalk-container' ); </script >
生成,发布页面(不要本地预览),登录你的博客网址,然后在进行你的 github 授权就行了
**排查错误**
添加图片放大 在 themes/hexo-theme-snippet/layout/_partial/head.ejs 添加入下内容
1 2 3 4 5 6 7 8 9 10 11 12 13 14 15 16 17 18 19 20 21 22 23 24 25 26 27 28 29 30 31 32 33 34 35 36 37 38 39 40 41 42 43 44 45 46 47 48 49 50 51 52 53 54 55 56 57 58 59 60 61 62 63 64 65 66 67 68 69 70 71 72 73 74 75 76 77 78 79 80 81 82 83 84 85 86 87 88 89 90 91 92 <script type ="text/javascript" > function hasClass (obj, cls ) return obj.className.match(new RegExp ('(\\s|^)' + cls + '(\\s|$)' )); } function addClass (obj, cls ) if (!this .hasClass(obj, cls)) obj.className += " " + cls; } function removeClass (obj, cls ) if (hasClass(obj, cls)) { var reg = new RegExp ('(\\s|^)' + cls + '(\\s|$)' ); obj.className = obj.className.replace(reg, ' ' ); } } window .addEventListener('load' , function ( var imgs = document .getElementsByClassName('post-body' )[0 ].getElementsByTagName('img' ) for (var i=0 ;i<imgs.length;i++){ if (hasClass(imgs[i],'class_no_full_screen' )){ continue ; } imgs[i].setAttribute('style' , "cursor: zoom-in" ); imgs[i].onclick=function ( var section=document .getElementsByTagName("section" )[0 ]; var imgView = document .getElementById('imgViewDom' ); if (imgView == undefined ){ imgView=document .createElement("div" ); imgView.id = "imgViewDom" ; section.appendChild(imgView) imgView.onclick = function ( addClass(imgView, "disnone" ); imgView.innerHTML="" ; } } imgView.innerHTML="<img id = 'jackslowfuck' src=" + this .src + " style='cursor: zoom-out; max-width: 100%;'" + ">" ; removeClass(imgView, "disnone" ); var jackslowfuck = document .getElementById('jackslowfuck' ); jackslowfuck.onclick=function ( addClass(imgView, "disnone" ); imgView.innerHTML="" ; } } } }, false ); </script > <style type ="text/css" > #imgViewDom { display : none; position : fixed; top : 0 ; left : 0 ; height : 100% ; width : 100% ; z-index : 99999999 ; background : rgba (0 , 0 , 0 ,0.7 ); overflow : auto; display : -webkit-box; -webkit-box-align: center; -webkit-box-pack: center; display : -moz-box; -moz-box-align: center; -moz-box-pack: center; display : -o-box; -o-box-align: center; -o-box-pack: center; display : -ms-box; -ms-box-align: center; -ms-box-pack: center; display : box; box-align: center; box-pack: center; cursor : zoom-out; } .disnone { display : none !important ; } </style >
视频大小调整 修改 hexo-theme-snippet/source/css/style.css
1
2
3
4
video { width : 100% ; max-width : 100% ; }
去掉首页懒加载图 在 hexo-theme-snippet/layout/index.ejs 文件中找到_photoUrl 修改为 false 如下所示
1
2
3
var _photoUrl = post.img || (urls.length > 0 && urls[random]) || (urls2 .length > 0 && urls2 [random2 ]) || '';_photoUrl = false
自动创建 gitalk issue 没自己动手….
我的配置 1 2 3 4 5 6 7 8 9 10 11 12 13 14 15 16 17 18 19 20 21 22 23 24 25 26 27 28 29 30 31 32 33 34 35 36 37 38 39 40 41 42 43 44 45 46 47 48 49 50 51 52 53 54 55 56 57 58 59 60 61 62 63 64 65 66 67 68 69 70 71 72 73 74 75 76 77 78 79 80 81 82 83 84 85 86 87 88 89 90 91 92 93 94 95 96 97 98 99 100 101 102 103 104 105 106 107 108 109 110 111 112 113 114 115 116 117 118 119 120 121 122 123 124 125 126 127 128 129 130 131 132 133 134 135 136 137 138 139 140 141 142 143 144 145 146 147 148 149 150 151 152 153 154 155 156 157 158 159 160 161 162 163 164 165 166 167 168 169 170 171 172 173 174 175 176 177 178 179 180 181 182 183 184 185 186 187 188 189 190 191 192 193 194 195 196 197 198 199 200 201 202 203 204 205 206 207 208 209 210 211 212 213 214 215 216 217 218 219 220 221 222 223 224 225 226 227 228 229 230 231 232 233 234 235 236 237 238 239 240 241 242 243 244 245 246 247 248 menu: - page: home url: / icon: fa-home - page: Qt url: /categories/Qt icon: - page: Python url: /categories/Python icon: - page: Linux url: /categories/Linux icon: - page: 杂谈 url: /categories/杂谈 icon: - page: 时间轴 url: /archives/ icon: - page: 关于 url: /about/ icon: favicon: /favicon.ico rss: /atom.xml carousel: img: './img/head-img.jpg' url: 'javascript:' widgets: - search - social - category - archive - tagcloud - friends jsonContent: searchLocal: false searchGoogle: true posts: title: true text: true content: true categories: false tags: false notification: |- <p> 主题下载:<a href="https://github.com/shenliyang/hexo-theme-snippet" title="fork me" target="_blank">Snippet主题</a> <br/> 主题使用:<a href="https://github.com/shenliyang/hexo-theme-snippet/blob/master/README.md#常见问题" title="" target="_blank">常见使用问题</a> <br/> 支持主题:<a href="https://github.com/shenliyang/hexo-theme-snippet/stargazers">Star一下</a> </p> social: - name: Github icon: git href: //github.com/spygg - name: 邮箱 icon: envelope-o href: mailto:liushidc@163.com - name: RSS icon: feed href: /atom.xml cate_config: show_count: true show_current: true arch_config: type: 'monthly' format: 'YYYY年MM月' show_count: true order: -1 tagcloud: tag3d: true textColour: '#444' outlineMethod: 'block' outlineColour: '#FFDAB9' interval: 30 freezeActive: true frontSelect: true reverse: true wheelZoom: false links: - Hexo官网: https://hexo.io/zh-cn/ - snippet主题博主: https://www.91h5.cc/ branding: 技术引领生活! banner: img: http://snippet.shenliyang.com/img/banner.jpg homePanel: true defaultImgs: - excerptLength: 120 toc: true highlightTheme: bootstrap: fontAwesome: warning: days: 300 text: '本文于%d天之前发表,文中内容可能已经过时。' declaration: enable: true title: '转载声明' tip: |- 商业转载请联系作者获得授权,非商业转载请注明出处 © <a href="" target="_blank">spygg</a> reward: alipay: '/img/zhifubaocode.jpg' wepay: '/img/weixincode.jpg' tip: 您的支持是我前行的动力! valine: enable: true appId: appKey: placeholder: 说点什么吧 notify: false verify: false avatar: mm meta: nick,mail pageSize: 10 changyan: enable: false appid: conf: livere: enable: false livere_uid: gitalk: enable: false clientID: clientSecret: repo: owner: admin: perPage: id: disqus: enable: false shortname: snippet count: false gitment: enable: false owner: repo: client_id: client_secret: perPage: 10 uyan: enable: false uyan_id: visit_counter: site: false page: false cnzz_analytics: baidu_analytics: google_analytics: tencent_analytics: baidu_site_verification: baidu_push: true since: 2019 robot: 'all' version: 1.2 .1

 支付宝打赏
支付宝打赏
 微信打赏
微信打赏